


It’s counterintuitive, I know, but you should really be dialing the limiter first in your mastering chain.
Don’t get it twisted - I’m not telling you to put the limiter first in your mastering chain. Nope. It has to be last or it can’t do its job: being the final say in preventing peaks and controlling loudness. But you should be dialing it in first - last in terms of signal flow, first in terms of workflow.
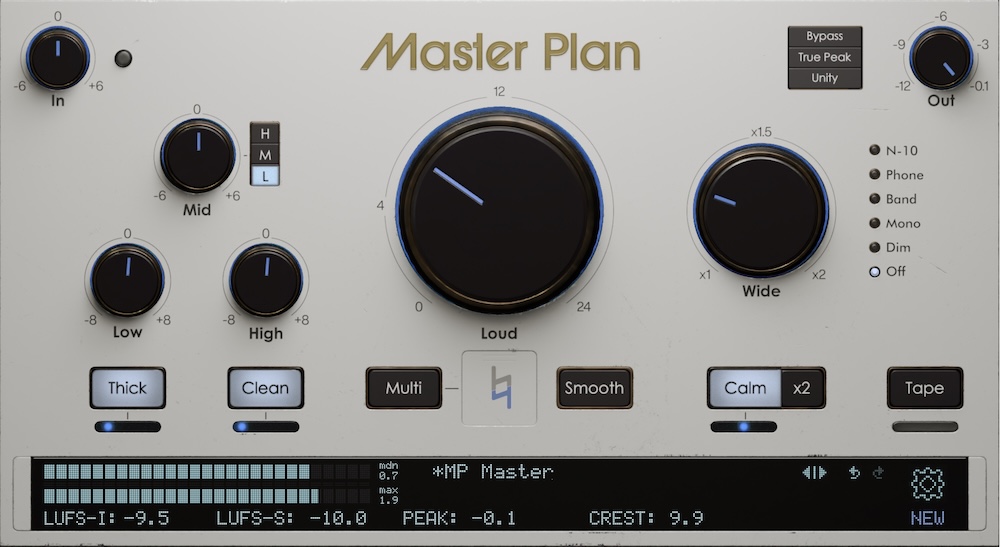
That’s why it’s counterintuitive. I think there’s an idea floating around that EQ should be the first step in mastering because it should also be first in the processing chain. It makes sense - broad-strokes EQ changes are often an obvious first move when polishing up a track. And yes, most of the time it does make sense to have EQ first in the mastering chain for that exact reason. And yes, since we are talking about Master Plan here, the EQ is technically the first stop, and the limiter (Loud) is last.
But quit it! Leave the EQ alone for now. I mean it! Take the mouse off that knob. Don’t worry, it’ll be there when you’re ready for it. Start with Loud.
If we’re doing one thing during mastering, it’s getting the loudness right for a release. We’re probably doing more than one thing, of course, but we’re definitely making sure the loudness is where it needs to be for the song to shine out in the wild. Forget -14 LUFS, by the way - the magic number is the one that sounds the best. And in just about every case, getting the loudness right during mastering is going to mean bringing it up.
Side note: if a mix is already louder than you want it to be before mastering, that mix is too loud. Full stop. Revisit the mix, figure out what’s got it stuck in the red, and back off. Now we’re ready to master.
Turn up the Loud and listen to what it does. It can be very instructive to do this with Unity engaged, so you can focus on what sonic effect the limiter is having on the master. Find the sweet spot. For a lot of genres, you might find it where the track hits around -10 LUFS - watch that LUFS-I meter - though for more intense stuff like metal or EDM it will probably be north of there. If -6 LUFS is where it sounds best, don’t sweat the number, just go with it! Turn off Unity when you’re done.
Ok, now we’re ready for that EQ, right?
Not quite, actually. Next, try dialing in Wide. Again, counterintuitive - I know. But try it. Find the sweet spot - turn up that digital knob until you start to hear the track coming to life in stereo. Then stop, and maybe back off a bit. Take a listen. What does it need?
Alright, buddy - go ahead and add that EQ, compression (Smooth), saturation (Thick), whatever the master needs. It’s time now. And you can trust the choices you make here, because you’re not reaching for a multipressor when you really just want the track to be louder. Or dialing up high end because you want the percussion to be more exciting. Wide already did that because those percussion tracks were hard panned to the sides. Cool, huh?
When you’re done, you will probably have to revisit those first two controls, Loud and Wide. Fine tune ‘em and call it a day.
Even though stereo imaging and limiting are going to be at the end of just about every mastering chain in terms of signal flow, consider making them the first step in your mastering workflow. You might even find that you don’t have to do too much else. Shocking, I know.
Isn’t mastering supposed to be hard?